Processes

The Process tab is one of the main views in Advactory. Here you can design processes for your assets according to your organization's needs.
Tasks and Processes are not the same! Tasks are instances of processes that are triggered according to a schedule and can be showing up multiple times at once. Processes should be unique!
First create process categories, then processes.
Create new Processes & Process Categories
Before creating a new Process, define Process Categories. This is optional but it will help structuring your processes right from the beginning. Similar to Asset Categories, you can do this by clicking on the grey 'Plus' sign.
To create a new Process click the yellow button in the lower right corner. A new menu will open:
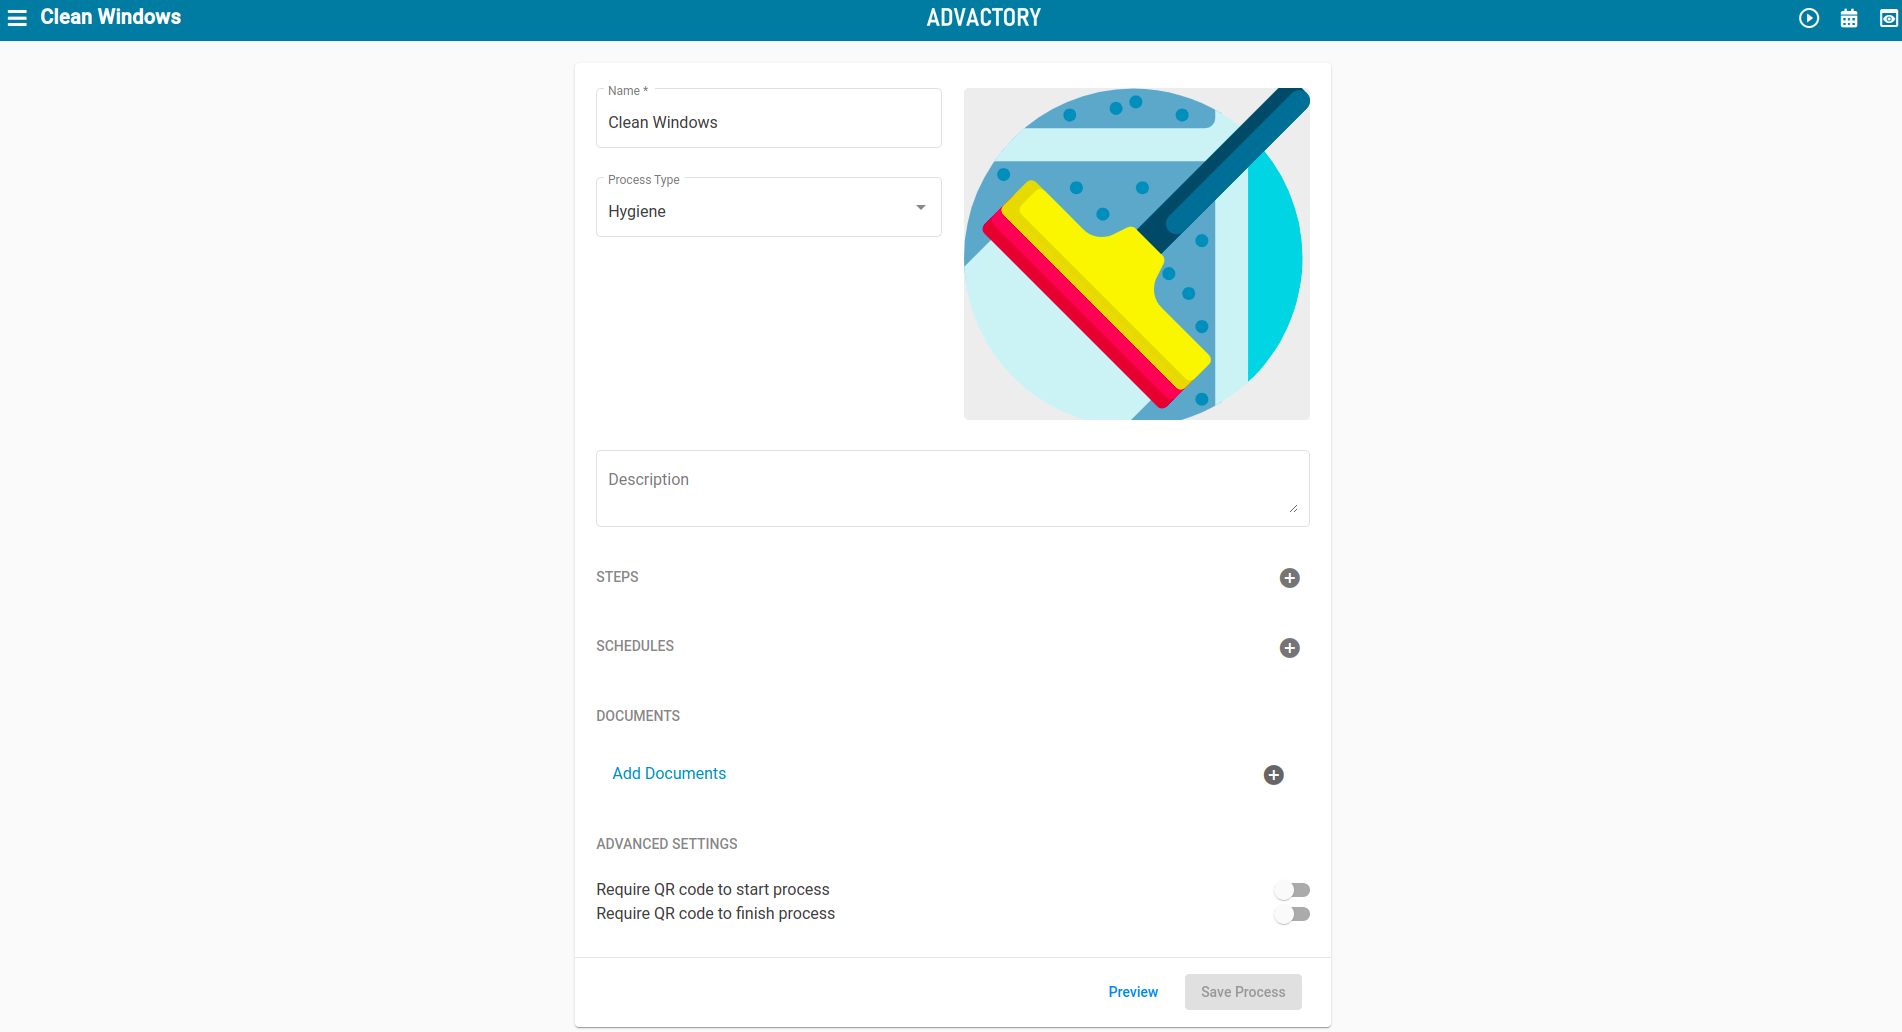
- Name : Insert the name of the process
- Process Type : Insert one of the Process Categories that you created before
- Description : Add a meaningful description to your process
Steps
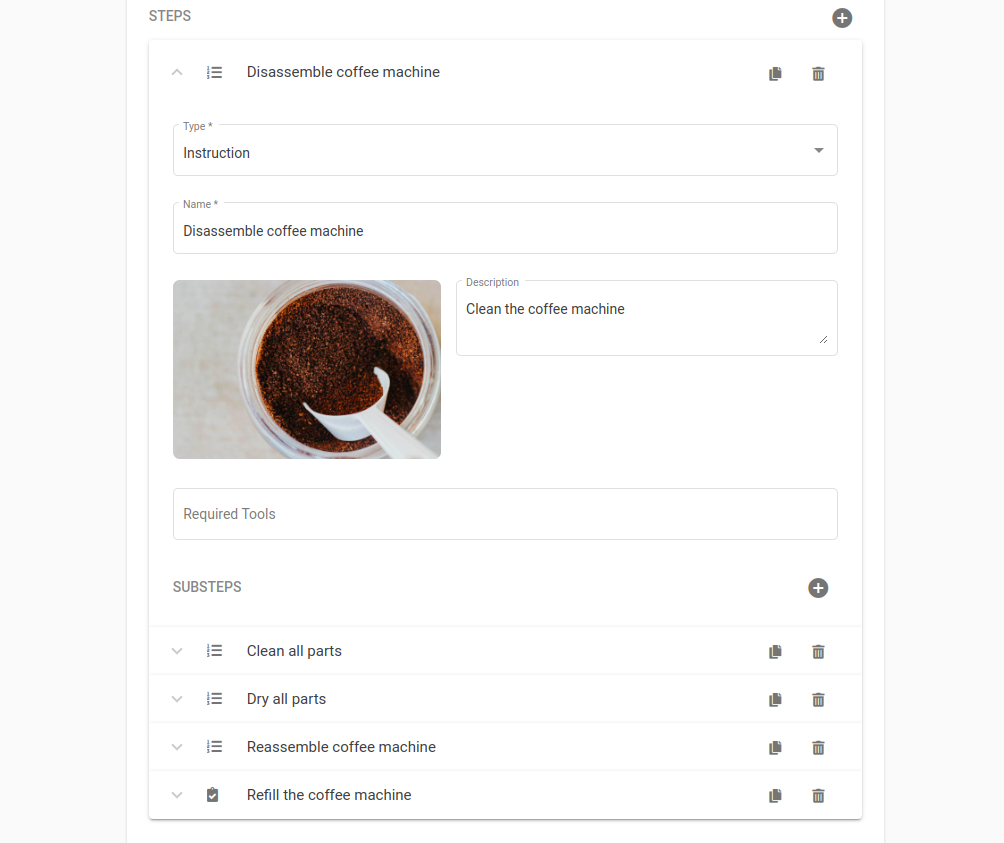
In the Steps section, include all steps necessary to fulfill the tasks. Steps can have 3 types, Instruction, Confirmation and Checkpoint.
Instruction steps should be used for complex tasks that need a thorough description of the task. You can also add substeps to the process and mention tools that are required for the execution.
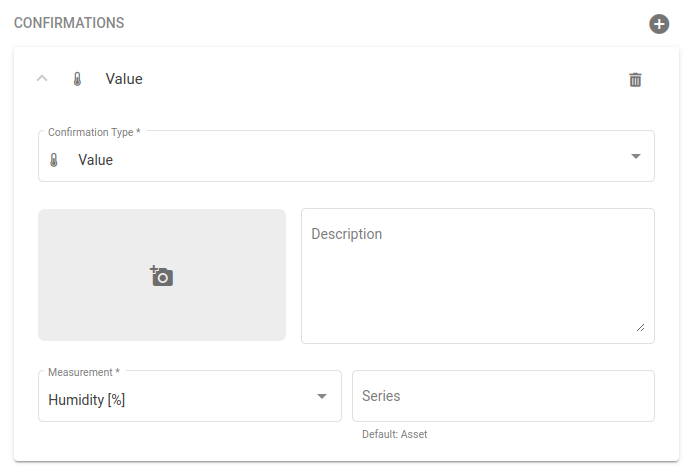
Confirmation steps come to work when a confirmation by the Operator is needed. This can be a simple mouse click, a photo of a pipe that has to be inspected or a sensor value that has been read out as an example. You can add multiple types of confirmations within one process step, simply select the type of confirmation and fill out the corresponding fields.
To see if your selected confirmation type works as desired please use the Preview function at the bottom inside the process you want to inspect, you will be able to see the tasks in the Operator point of view.
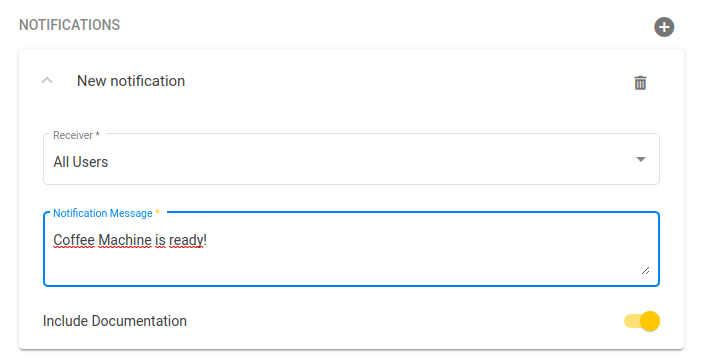
Moreover, you can add notifications to your confirmation step. Add a receiver (one of the users or groups) and a message to be sent. If your confirmation type asks the Operator for a photo or other input, you can choose to also attach that to the notification by pressing the slide button "Include Documentation".
Notifications will only be sent as soon as the entire process is marked as done, so all steps, substeps and confirmations within each step.
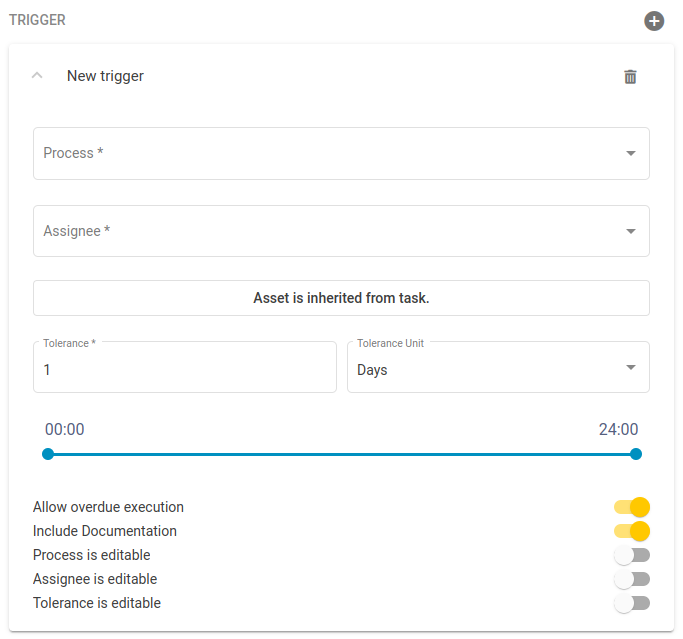
Another feature is the possibility to set trigger processes. If the process has not been confirmed, one or multiple processes can be triggered as a result. For this to happen, add a new trigger process by clicking the grey plus sign on the right, select the new process and the assignee and set a schedule. If the process will affect a different asset, also define that.
Checkpoint steps should be used for simple tasks that only require a click on a checkbox.
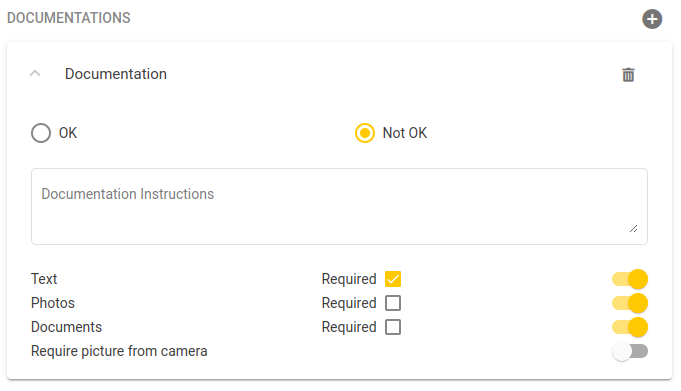
For checkpoint steps you can enable documentation if needed. First choose whether documentation shall be collected when the task is marked as OK or not. Fill in a description for the documentation process and enable up to 3 types of recording the documentation by clicking on the corresponding slide button. If you selected to capture photos you can also enable the fourth slider if you want the photo to come directly from the camera instead of the photo gallery. After this, choose which of the documentation type shall be required by marking the corresponding chechbox.
In checkpoint steps you can also set notifications and triggers, as a reference have a look on notifications and triggers in the Confirmation section. The only difference to checkpoints is the possibility to decide whether they should be triggered when the process is marked as OK or not.
Once again, notifications and triggers are only send out when all steps of a process have been fulfilled.
Schedules

Once you added steps to the process, it is time to add a schedule. This will define when and how often a task is sent out to the inbox of the Operator and the timeframe of execution.
First, add the assignee in charge of the process as well as the asset the process should be performed on. Then, define how often the task should take place (e.g. weekly on Tuesday, yearly, etc.) and a start date. If you set an end date, keep in mind that tasks will not be sent out after the schedule's end date. Set a time at which the task will be sent out, a tolerance time for the execution and a timeframe in which the task can still be executed. For more information, also have a look into the Entry section within Process Plans.
If you want to use a process inside a process plan, leave the Schedules section empty.
If you select a monthly or yearly schedule and set the start date to a special date that prevents tasks from beeing generated regularly, the scheduler will accomodate for that and schedule reasonably near dates. For example you select the 5th Wednesday in May and select a monthly schedule, the scheduler will schedule each month on the last Wednesday. Here is a comprehensive list of mappings that we apply
| Input schedule | Effective Schedule |
|---|---|
| Monthly by week day and the 5th day in month | last week day in month |
| Monthly by day number and number > 28 | last day of month |
| Yearly by week day and the 5th day in month | last week day of month |
| Yearly by day number and start date is 29th of Feb. | last day of month |
Measurement-based Schedules
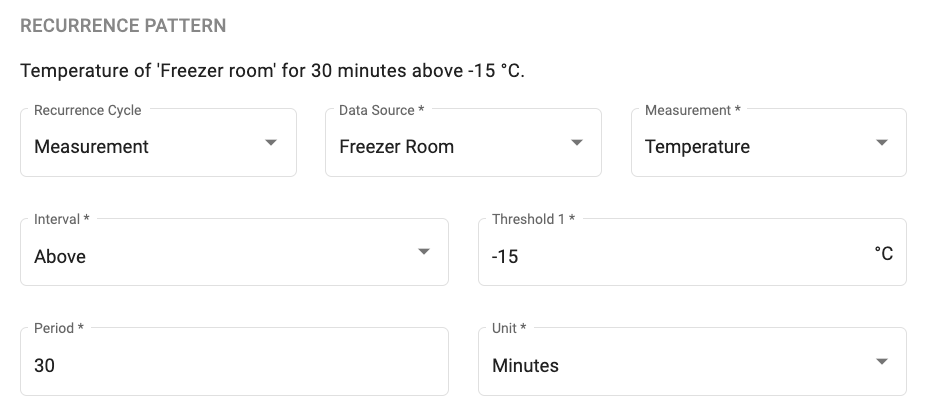
Measurement-based schedules create a task when the selected condition is fulfilled.
Select a Data Source (a connected sensor), the Measurement to track, an Interval type and the corresponding Threshold(s).
If the Period is set to 0 then a single measurement value meeting the condition will trigger the task creation.
Otherwise, the condition has to be sustained for the configured period of time.
There are several options to fine tune these schedules:
- Negate condition
- Execute only when condition switches
- No new tasks within tolerance: Do not create a new task if an old task is still within tolerance, even if that task has already been closed.
- Set tolerance by condition: When the condition is not fullfilled anymore, automatically adjust the tolerance to end at that moment, too.
The illustrated measurement schedule will create a task if the Freezer Room sensor reports a temperature of more than -15°C for a period of at least 30 minutes. For more information have a look at the use case
This is only available within Processes and not within Process Plans.
Documents
In this section you can attach any documents helpful to fulfill the task. This could be a manual on how to disassemble the coffee machine for cleaning purposes or a map of the location to perform maintenance checks on facilities.
Advanced Settings
It is also possible to ask for a QR code when starting or finishing a process. You can assign an asset a standard or custom QR code as stated here. This QR code needs to be scanned if the slide button in this section of the process is enabled.
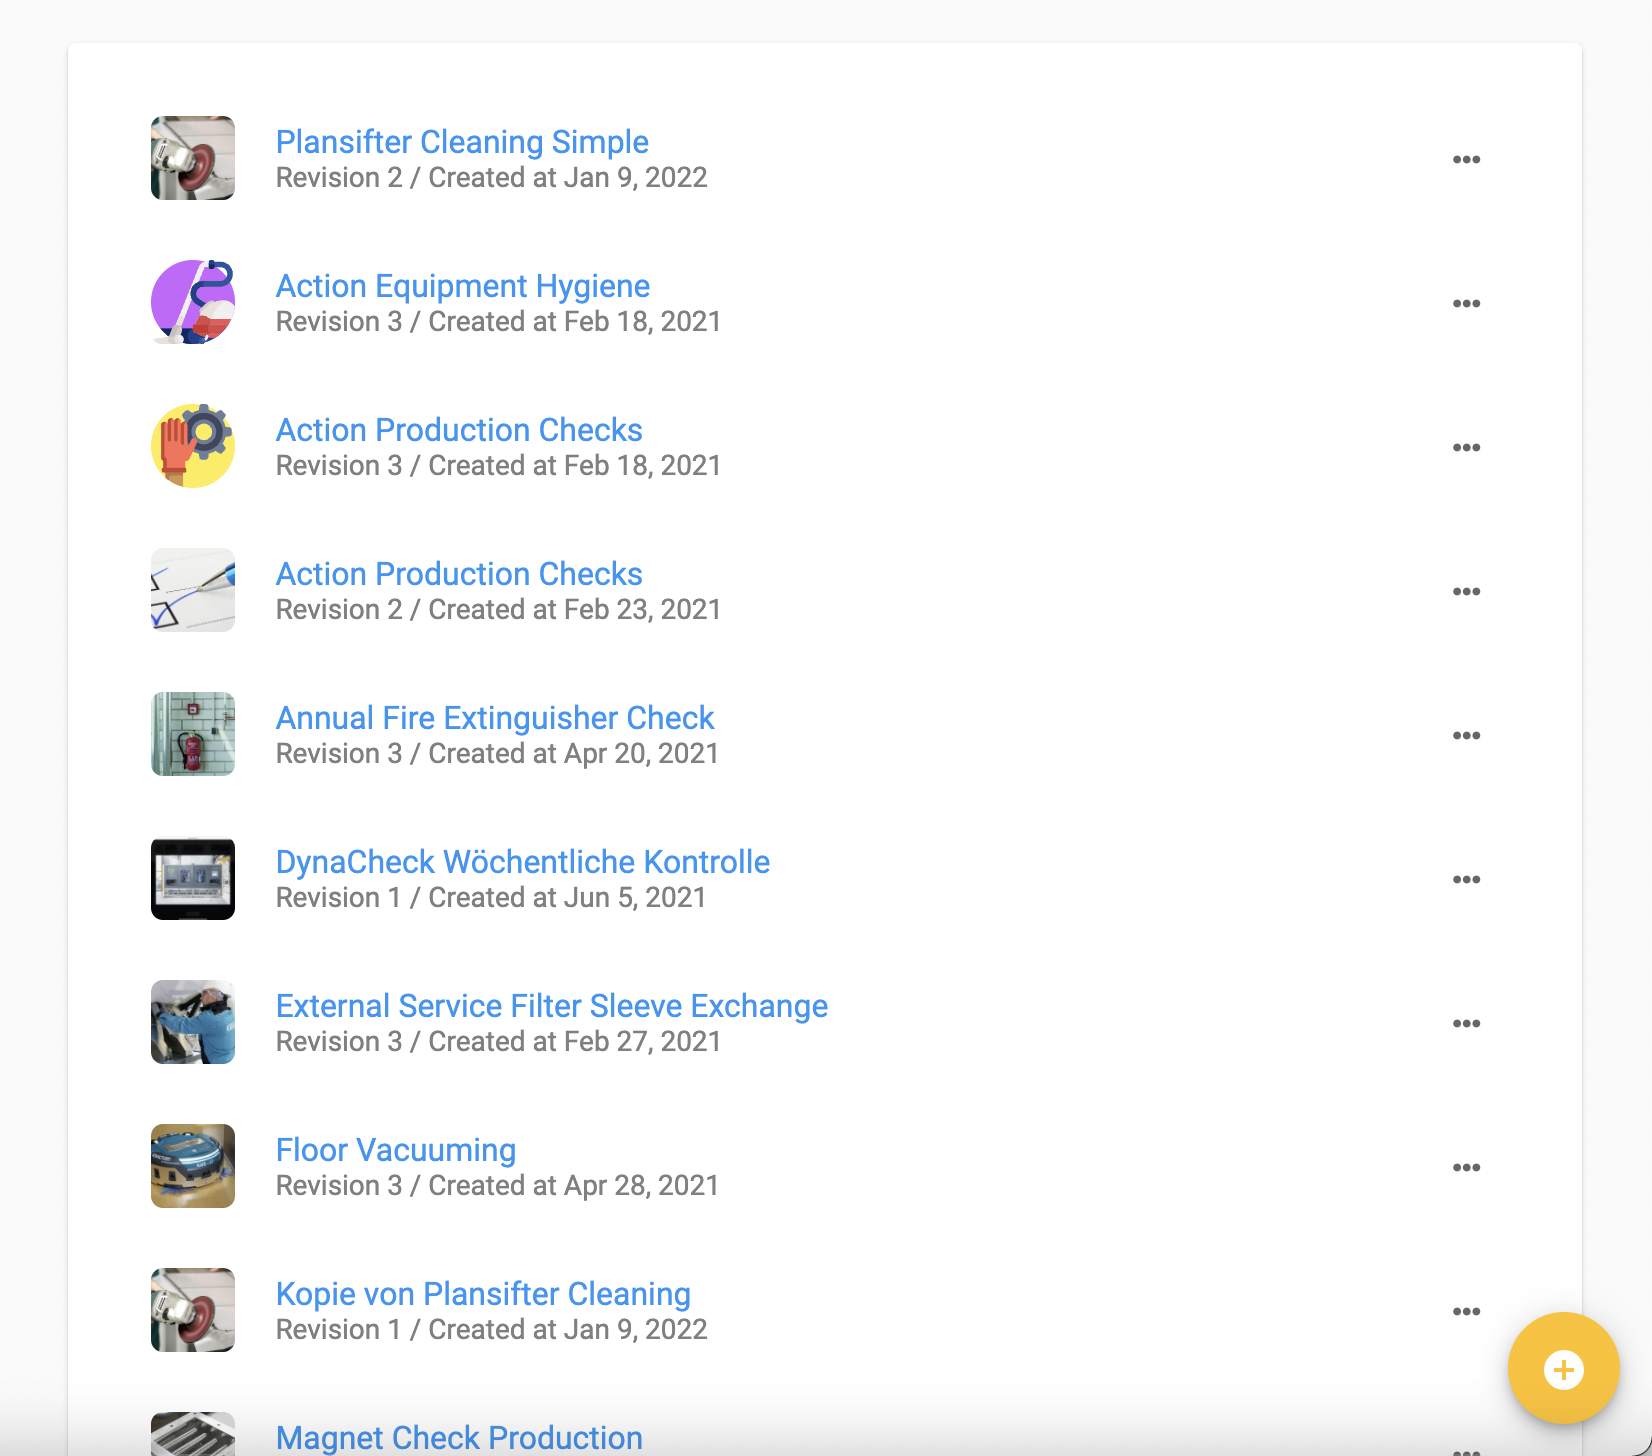
Managing Processes
Processes can still be edited after creating them. Pressing the three dots or right-clicking on the process opens up a menu. Besides adding changes under the Edit option, it is also possible to copy a process. This is useful if you want to have a similar process with small changes. Moreover you can choose to Schedule Now a process to set a schedule outside of the regular schedule set while creating the process. Execute Now will immediately schedule the process, the Assignee will immediately receive the task. If you want to delete a process you can select Mark for Deletion. This will initiate the approval process, similar to the creation of processes. For reverting this click right again on the process and select Revert Deletion.
Keep in mind that editing a process will make changes to tasks that have not been started yet. Tasks with Due Start Date in the past will not be affected.